The step-by-step guide “How to Load Sublimation Paper Properly in Your Printer” offers clear instructions for effectively loading sublimation paper into your printer, ensuring high-quality printing outcomes.
Top-rated printers for stunning photo prints


Check Printer Compatibility
Before loading sublimation paper, it is crucial to confirm that your printer is compatible with sublimation printing. To determine this compatibility, refer to the printer’s user manual or visit the manufacturer’s website for detailed information on sublimation paper compatibility. These sources will provide you with the necessary instructions and guidelines to ensure that your printer supports sublimation printing effectively.
To help you navigate this process smoothly, here are a few imperative steps:
- Consult the user manual: Start by locating the user manual that came with your printer. Look for a section that specifically addresses printer compatibility with different types of paper, including sublimation paper. Read through the instructions carefully to determine if your printer is suitable for sublimation printing or if any additional accessories or settings are needed.
- Visit the manufacturer’s website: If the user manual does not provide sufficient information, visit the official website of the printer’s manufacturer. Look for a support or FAQ section that covers sublimation printing compatibility. The website might offer specific instructions on how to prepare your printer for sublimation printing or recommend compatible paper brands for optimal results.
By following these steps and verifying your printer’s compatibility with sublimation printing, you can ensure that your sublimation paper is loaded correctly and that your printer is ready to produce high-quality, vibrant prints.


Prepare Printer Tray
To prepare the printer tray for use, start by opening it and carefully removing any paper or media that may be already loaded. This is important to prevent any mix-up or jamming during the printing process. For example, gently take out any plain paper or other types of media that may have been previously loaded.
Next, adjust the paper guides to match the size of the sublimation paper you will be using to print. To do this, locate the paper guides on the sides of the tray and slide them inward or outward accordingly. For instance, if the sublimation paper you have is 8 by 10 inches, adjust the guides to match these dimensions. This ensures that the paper is held securely in place and prevents any misalignment issues.
Finally, take a moment to inspect the tray and make sure it is clean and free from any debris. Use a lint-free cloth or a soft brush to gently clean the inside of the tray. This step is crucial to avoid any unwanted marks or smudges on the printed output. For example, remove any dust, small paper scraps, or adhesive residues that may be present in the tray.
By following these clear, easy-to-follow instructions, you can successfully prepare your printer tray for printing with sublimation paper.


Handle Sublimation Paper Properly
To ensure optimal print quality, it is crucial to handle sublimation paper correctly, as it is highly sensitive to moisture and fingerprints. Follow these simple steps to handle sublimation paper with care:
- Hold the paper by its edges: To avoid touching the printable surface of the sublimation paper, always handle it by its edges. This will help prevent any unwanted marks or fingerprints from affecting the print quality.
- Store in a cool, dry place: To prevent moisture absorption, store the sublimation paper in a cool and dry environment. Excessive humidity can cause the paper to become saturated, resulting in poor printing results. Prolonged exposure to moisture can also make the paper stick together or become unusable.
By following these instructions, you can maintain the integrity of the sublimation paper and ensure that your prints turn out vibrant and flawless. Remember, taking extra precautions to keep the paper dry and free from fingerprints will lead to excellent printing results.


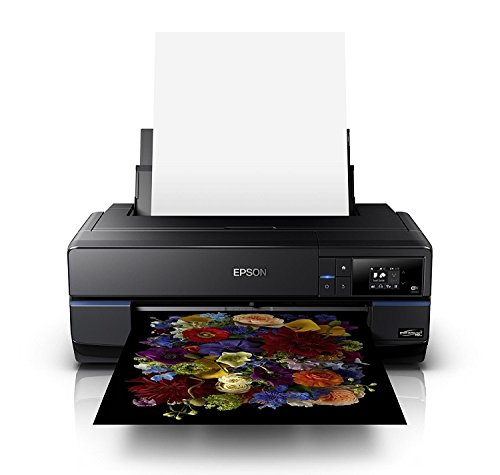
Load Sublimation Paper
- To start, make sure you have the sublimation paper ready to load into the printer tray. Ensure that the printable side of the paper is facing up, as this is the side that will come into contact with the print head during the printing process.
- Next, locate the printer tray and open it. Take a moment to identify the paper guides, which are usually adjustable sliders that help align the paper within the tray.
- Align the edges of the sublimation paper with the paper guides, making sure it is centered. Gently slide the paper into the tray, pushing it all the way in until it stops. Take care not to force the paper, as this may lead to misalignment or paper jams.
- Once the sublimation paper is securely placed in the tray, close the tray and make sure it is properly latched. This will ensure that the paper is correctly positioned for printing and minimize the risk of any issues during the printing process.
Remember to follow these instructions carefully to avoid any potential problems and to achieve the best printing results with your sublimation paper.


Adjust Printer Settings
To access the printer settings on your computer, first open the document or image you want to print. Then, click on the “File” menu and select “Print” or use the shortcut Ctrl + P. A print dialog box will appear on your screen. Look for a button that says “Properties” or “Printer Settings” and click on it. This will open a new window or tab with a range of options for your printer.
If you prefer to adjust the printer settings directly from the printer’s control panel, start by locating the menu or settings button on the printer. Press it to display the available options. Navigate through the menu using the arrow keys or touch screen, if available, until you find the settings related to paper type and print quality. Once you have found the appropriate settings, select the desired paper type, such as ‘sublimation paper’ or ‘transfer paper’, and adjust the print quality settings according to your desired output. Make sure to save any changes before exiting the settings menu.
For example, if you are using a computer with Windows operating system and want to adjust the print settings, open the document you want to print, press Ctrl + P, click on “Properties” or “Printer Settings,” and select the appropriate paper type and print quality settings. Alternatively, if you are using a printer with a control panel, locate the menu button, navigate to the paper type and print quality settings, and adjust them accordingly. Remember to save your changes before printing.


Wrapping up the process
To sum up, loading sublimation paper properly in your printer is crucial for achieving the best printing outcomes. By carefully adhering to the steps outlined in this blog post – checking compatibility, preparing the tray, handling the paper with care, loading correctly, and adjusting printer settings – you can ensure successful printing and save valuable time and resources. Don’t forget, proper loading is the key to optimal results in sublimation printing.
Necessary Supplies


Printer Paper Loading Tips
Optimal Sublimation Paper Settings for Achieving Excellent Print Results with Epson Printers
Guidelines for Operating the Sublimation Photo Printer
- Start by reading the user manual thoroughly to understand the capabilities and functions of the sublimation photo printer
- Ensure that you have the necessary supplies, including sublimation ink cartridges, sublimation paper, and compatible printing media
- Connect the printer to a power source and then to your computer via USB or wireless connection, following the instructions provided in the manual
- Familiarize yourself with the printer’s software, which typically includes a driver or specific printing application. Install the software on your computer, if required, and configure settings such as print quality, paper size, and color management
- Load the sublimation paper into the printer tray or cassette, making sure to insert it properly according to the printer’s instructions
- Use image editing software, such as Adobe Photoshop, to prepare your photos or designs for printing. Adjust colors, size, and resolution to achieve the desired result
- Open the image you want to print and select the printer from the software’s print dialog. Ensure that the settings match your preferences, such as color mode, paper type, and print layout
- Preview the printout to verify that the image is correctly positioned and sized as desired
- Once satisfied, initiate the printing process. The printer will transfer the sublimation ink onto the sublimation paper, which will then be ready for heat transfer
- Depending on the printer model, you may need to use a heat press machine or an alternative method to apply heat and pressure to the sublimation paper, transferring the image onto your desired substrate, such as a t-shirt or ceramic mug
- Follow the specific instructions provided with your printer and heat transfer equipment for the best results
- Allow the print to cool down after the heat transfer process is complete. This helps prevent smudging or damaging the print
- Finally, inspect the print for any imperfections or irregularities. Adjust your settings, paper, or image quality as necessary for future prints. Store any remaining sublimation paper and ink cartridges in their designated locations to preserve their quality for future use